Press "Enter" to skip to content

Posts published in “Landscaping”

How to Deal with Weeds in Your Grass Lawn: Effective Strategies

0

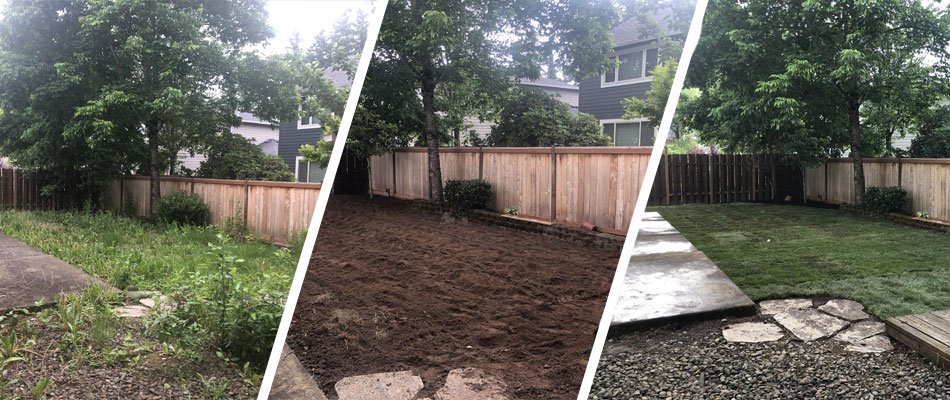
Maintaining a lush, green lawn can be a homeowner's pride, but pesky weeds can quickly turn that pride into frustration. Weeds not only detract from the aesthetic appeal of your lawn but also compete with grass for nutrients, water, and sunlight, ultimately leading to a weaker, less healthy turf. However, with the right strategies, you can effectively manage and control weeds in your grass lawn, ensuring a vibrant and flourishing outdoor space. In this guide, we'll explore some proven tactics to combat weeds and reclaim the beauty of your lawn.

Identify the Enemy

Before you can effectively tackle weeds, it's crucial to identify the types of weeds growing in your lawn. Common lawn weeds include dandelions, crabgrass, clover, chickweed, and daisy. Each weed may require a different approach for effective control. Take some time to research and accurately identify the weeds plaguing your lawn to determine the most suitable treatment methods.

Maintain Healthy Turf

A healthy, vigorously growing lawn is your first line of defense against weeds. Proper lawn care practices such as regular mowing, watering, and fertilizing promote dense grass growth, which naturally inhibits weed germination and growth. Aim to mow your lawn at the appropriate height for your grass type and water deeply but infrequently to encourage deep root growth and discourage weed establishment.

Hand Pulling and Manual Removal

For a few scattered weeds or small infestations, hand pulling or manually removing weeds can be an effective and environmentally friendly approach. Make sure to pull weeds from the root to prevent regrowth. This method is best suited for broadleaf weeds and should be done when the soil is moist to ease weed removal.

Use of Herbicides

Herbicides are chemical substances formulated to control or kill weeds. Selective herbicides target specific types of weeds while minimizing harm to desirable plants like grass. Pre-emergent herbicides are applied before weed seeds germinate, preventing weed growth altogether. Post-emergent herbicides are used to control weeds that have already sprouted. When using herbicides, always follow the manufacturer's instructions carefully and consider organic or environmentally friendly options if possible.

Overseeding and Thickening

Overseeding involves spreading grass seed over existing turf to fill in bare patches and improve lawn density. A thick, healthy lawn naturally suppresses weed growth by shading out weed seeds and preventing them from establishing. Choose a grass seed blend suitable for your region and lawn conditions, and overseed your lawn in the fall or spring for optimal results.

Mulching and Landscape Fabric

Mulching around garden beds and landscape areas can help suppress weed growth by blocking sunlight and preventing weed seeds from germinating. Organic mulches like wood chips, straw, or compost also improve soil health and moisture retention. Landscape fabric or weed barriers placed beneath mulch further inhibit weed growth by creating a physical barrier between the soil and the mulch layer.

Regular Maintenance and Inspection

Consistent maintenance is key to keeping weeds at bay. Regularly inspect your lawn for signs of weed growth and promptly address any issues before they escalate. Pay attention to areas with poor drainage, compacted soil, or thin grass cover, as these are prime spots for weed infestations.

Cultural Practices

Implementing certain cultural practices can help prevent weed growth and promote a healthier lawn overall. These practices include aerating the soil to improve air and water infiltration, dethatching to remove excess organic matter, and avoiding overwatering and overfertilizing, which can create favorable conditions for weed growth.

Seek Professional Assistance

If your weed problem persists despite your best efforts, consider seeking professional lawn care services. Lawn care professionals have the expertise and resources to assess your lawn's specific needs and develop customized weed control strategies. They can also provide ongoing maintenance to keep your lawn healthy and weed-free.

By implementing these effective strategies for weed control in your grass lawn, you can enjoy a beautiful, thriving outdoor space that enhances the beauty and value of your home. Remember that consistency and diligence are key to long-term weed management success. With proper care and attention, you can reclaim your lawn from invasive weeds and create a lush, green oasis for relaxation and enjoyment.

How to Maintain Your Lawn After Installing Fresh Sod

0

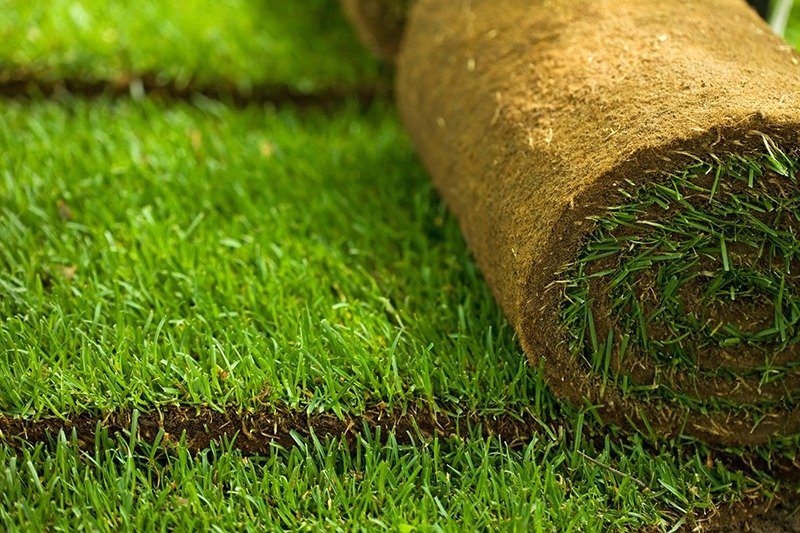
Whether you have recently installed fresh sod or you are just starting to care for your lawn, there are a few things you can do to keep your lawn looking great. Aerating your lawn can help prevent soil compaction and keep your grass healthy. Make sure to check for dry spots after watering and treat for insects.

Aeration helps prevent soil compaction

Whether you are trying to create a green yard or just want to ensure that your lawn is healthy and looks its best, aeration helps prevent soil compaction. The process involves perforating the soil with small holes to allow air and water to penetrate the root system. This also promotes vigorous growth of the grass root system.

The process should be performed within the first year of installation. It can be done as often as every few years.

There are several methods for aerating the ground. Some methods are hollow tine aeration, solid tine aeration, and spike aeration. Solid tine aeration is a technique that drills a small hole into the lawn. The core of the soil is then pulled out of the hole.

Hollow tine aeration is a method that uses a machined tube to create holes in the soil. It is a less effective method. The process can be a bit time-consuming.

It is important to remember that aeration is only effective when the soil is in a healthy condition. This means that if your lawn is dormant, it should not be aerated.

Adding organic matter to the soil can also improve the condition. Organic matter acts as a natural glue that maintains the porosity of the soil. It also feeds soil organisms and helps maintain drainage. This also helps prevent the re-compaction of mineral particles.

Check for dry spots after watering

During the first few weeks of your new sod's life, it is important to check for dry spots. They can cause damage to your lawn and make it look worse. If you find one, it's best to remedy the situation as soon as possible.

The best way to find dry spots is to check your soil. You can buy a soil moisture gauge from your local garden store. It has a metal spike that you place in the soil to gauge its moisture level.

If the gauge is indicating that the soil is dry, it's time to start watering. The goal is to keep the soil underneath moist so that the roots can get a grip on it. Water should penetrate about 4-6 inches into the soil.

You should water at least twice a day. The amount you water will depend on the weather and the type of grass you have. For instance, tall fescue needs about two waterings a day. In the winter, less water is needed. In the spring and summer, you may need more.

The best time to water is early in the morning, before sunrise. This will help prevent water from evaporating too quickly. It's also a good idea to water at least once a day in the evenings. This is when most dry spots are found.

Treat for insects

During the first month after you have installed new sod, you must make sure you treat your lawn for insects. Many insects can wreak havoc on your lawn. You may find that your lawn is infested with grub worms, white grubs, or chinch bugs. These insects can be difficult to control, but you can find a product that will keep them out of your lawn.

Grub worms feed on grass, so they can cause significant damage to your lawn in a short period of time. Grub worms can be treated by applying insecticide or raking out dead grass. They can also be controlled by nematodes. Nematodes are small organisms that attack grubs over a period of weeks. You can apply nematodes directly to your lawn or you can add them to your garden sprayer water.

Sod webworms are another common pest to your lawn. These little insects are native to North America. They have long, pale green legs and antennae. They lay eggs in clusters and feed on the blades of grass. They may appear as small brown patches on your lawn. They are best treated by applying an insecticide.

The best insecticide to treat chinch bugs is a granular insecticide. Some products include pyrethroids. These provide control for both sod webworms and chinch bugs. Always consult a lawn expert before doing anything else on your sod.

https://www.youtube.com/embed/xVtQT2YAAqY

What Time of Year is Best to Install Grass Sod?

0

Whenever you're installing a new lawn, it's important to consider when to do it. The right time for sod installation depends on the type of grass you're planting and your climate. Cool-season grasses can be installed year-round. However, if your property is located in a temperate climate, it's best to wait until the warmer months before putting in your new sod.

Preparation is key

Whether you are installing a new lawn on your own or hiring a professional, there are a few steps you should take to prepare the area. This will ensure that the new sod will survive.

The first step in sod installation is measuring the area. Then, you should cut a strip of sod and lay it along the straightest edge. You should also make sure the ends don't overlap.

The next step is to water the sod. Watering early in the morning and late at night is important. This will help prevent evaporation and disease. For the first two to three days, you may need to water as much as half an inch per day.

After the new sod has been watered, it's time to begin the installation process. You can do this by hand, but a lawn roller or a sod knife will work well too.

You should also do some research on the best types of sod for your area. Some types of grass sod are better suited for cooler climates while others will thrive in hotter climates.

Cool-season grasses can be installed year-round

Depending on the climate in your area, cool-season grasses can be installed year-round. Cool-season grasses are semi-dormant grasses that grow best in cooler temperatures.

This season grasses are also known as ryegrass, fine fescue, and Kentucky bluegrass. They are usually sold as seed mixes. These mixes will help you get the best thickness and longevity out of your grass.

Grasses tend to be more colorful in cooler temperatures. They are also more tolerant of drought. Cool-season grasses also are easier to maintain in areas with limited space for turf.

It can be installed in the front yard or in the backyard. Cool-season sod is a good option for large lots. It is more economical than seeding.

A cool-season grasses are also available as ornamental grasses. They can be planted in containers or landscape beds. They are also used to provide extra shade.

During this season grasses are not as invasive as warm-season grasses. Some cool-season grasses, such as blue fescue, are also drought-tolerant. They also thrive in light shade.

Winter is not a good time to install grass sod

Whether you're a homeowner or a contractor, installing sod during the winter can be tricky. Unlike summer, when there's less water to go around, there's a heightened risk of freezing temperatures that can harm newly laid sod. Sod can be installed anytime, but if you live in a region with cold weather, you may want to wait until early spring before laying it.

Aside from freezing temperatures, sod also needs to be watered. New sod needs at least 0.25 inches of water each week to survive. This amount is enough to keep the first inch of soil moist, but additional watering may be required to keep the first two inches moist.

The coldest days of winter are often accompanied by a gentle breeze. This will help the newly laid sod develop a healthy root system. The rain from the next day will keep it moist and help it transition into spring. The rain will also help the grass grow more vigorously.

Tell if grass sod has taken root

Getting grass sod to take root is crucial to a healthy lawn. Whether you are laying sod yourself or hiring a landscaping expert to do the job, there are a few simple ways to check whether it has taken root.

You can check the sod by lifting up a few pieces. The underside of the sod should be white or brown. If the sod is lifting easily, it means it has not taken root. If it is difficult to lift up, the sod has taken root.

Depending on the type of sod you are using, the roots may take up to six weeks to take root. When the roots are fully developed, they will be strong enough to withstand droughts and freezes. During this time, you will need to water your lawn more often. The type of soil you use can also affect the amount of time it takes for the sod to take root.